Monday, May 14, 2018

Beary Thanks

Today I have another beary cute thank you card to share with you. I am again using a Bella image drawn by Conie Fong. Is she not beautifully girly?


I colored the bear with my Prismacolor colored pencils after printing it out on Canson Mi Tientes paper. I then cut the image out with a stitched oval die. I created a cardpanel of purple cardstock and embossed it with a dotted Darice embossing folder before applying it to a top folding cardbase.


I secured the image to the bottom left hand corner of the card so as to not cover up all the dots and also to leave sufficient place for my bold sentiment which I cut out 2x out of white cardstock with a thanks word die and layered on top of each other with the smallest offset.


Keeping the card very simple, I added only a little Wink of Stella to the word die cut and the bear's ear bow.

General supplies:
Canson Mi Tientes paper
Reflections 110lb heavyweight cardstock for card base
White and purple cardstock
Prismacolor pencils
White gel pen
Stitched oval die
Darice embossing folder
thanks word die


Sunday, May 13, 2018

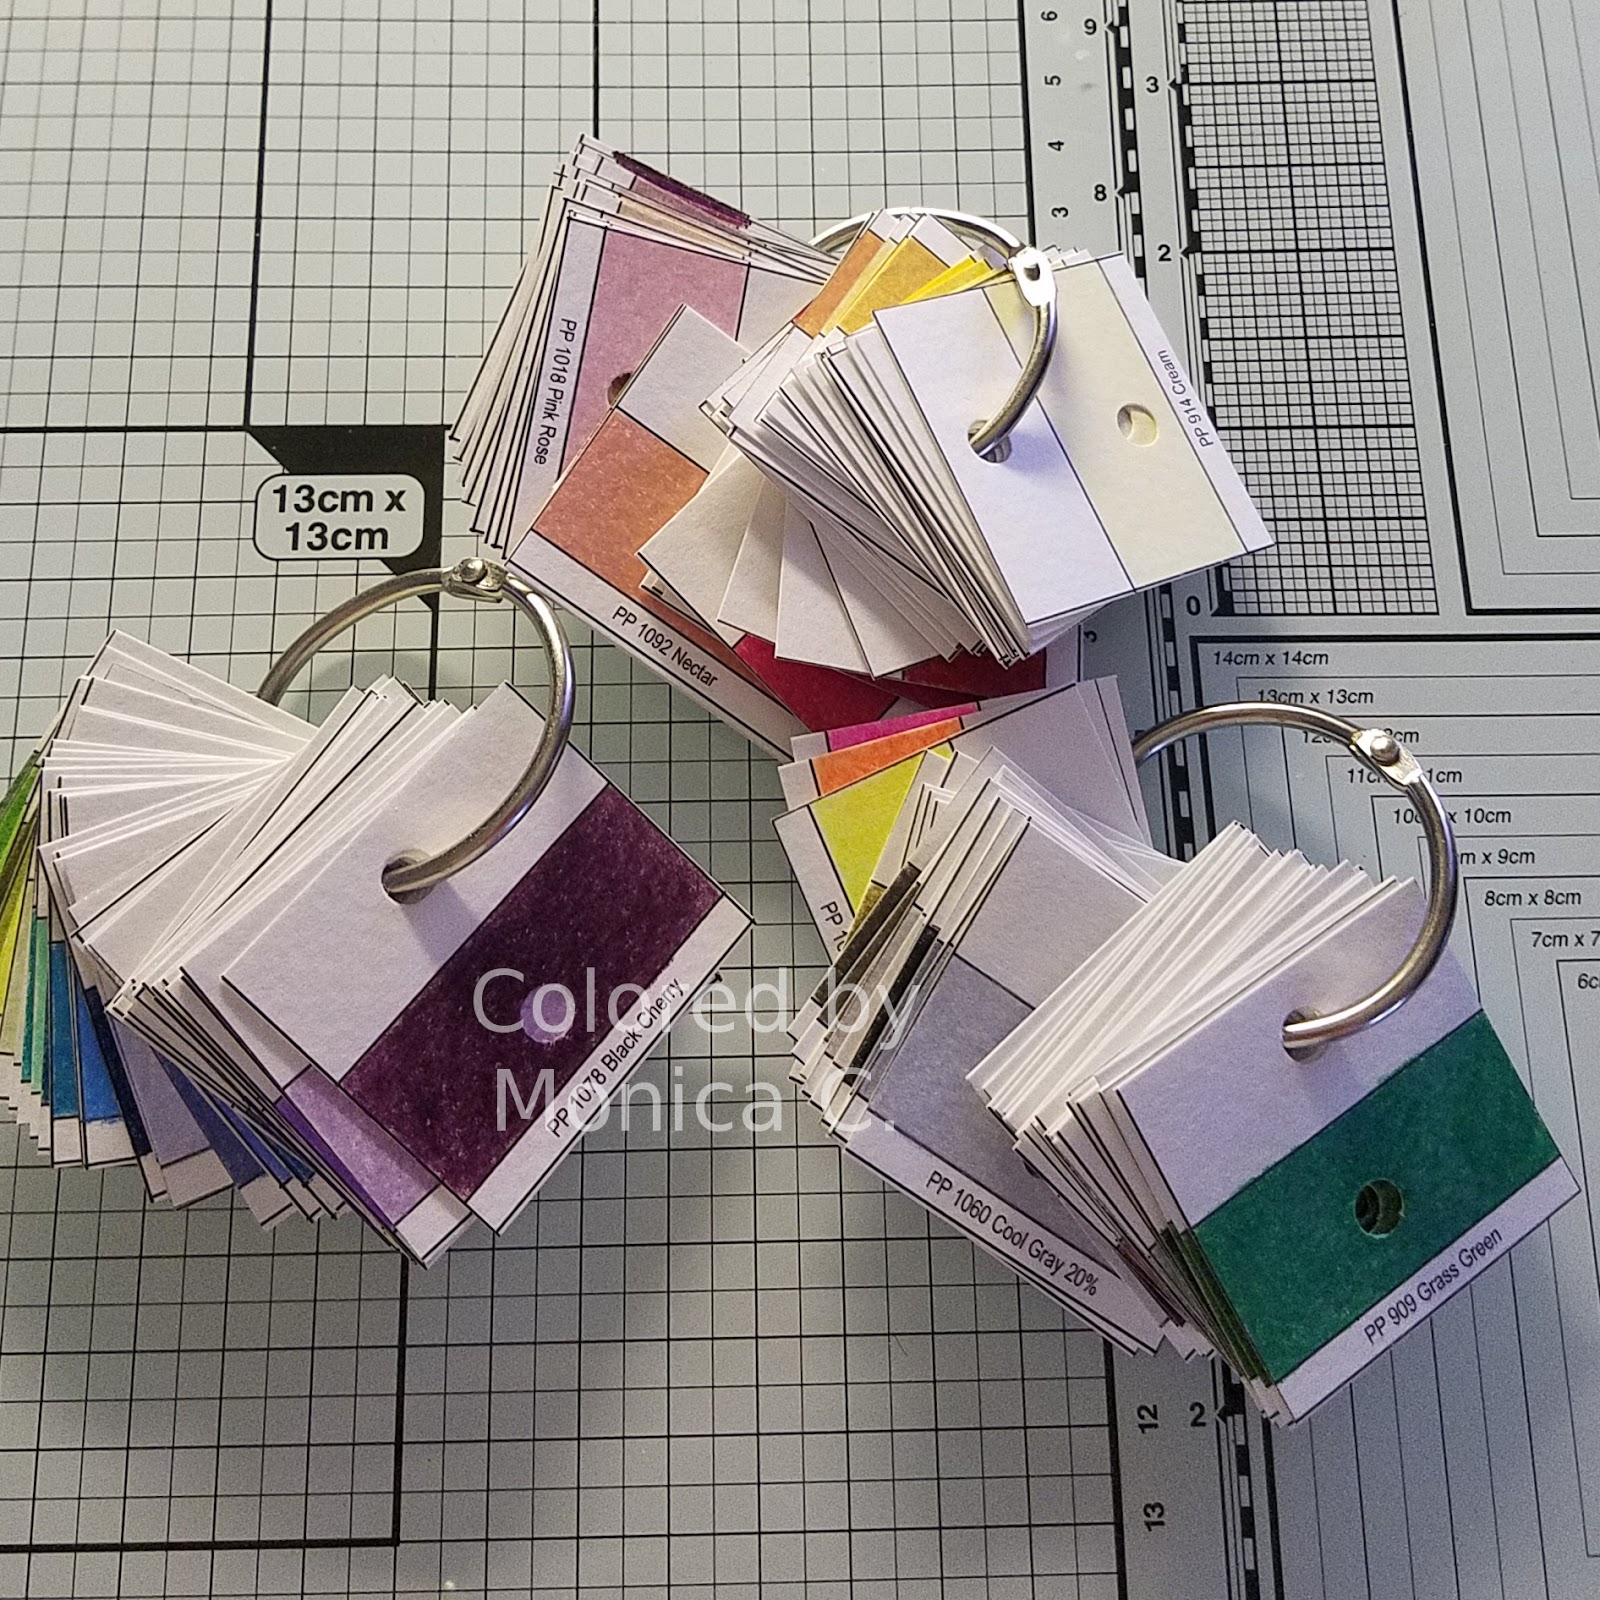
Swatch ring

The first time I had seen the idea of a swatch ring for coloring medium with a hole in the swatch for easy reference was on Kim Holden's website. I wanted to create a swatch set with only the main color on it and so I adapted her chart to a simpler one. This also brought the number of pages down to just 7. I printed them out on my Strathmore Paint Pad paper as I wanted the color to be on the paper that I use the most when coloring. I colored all the pages (which I have to admit, did take quite a while) and then I cut the swatches apart.


Once I had 150 little squares, I then punched a hole in the top white area for the ring and in the bottom colored area for a see-through hole to reference color more accurately.


I did eyeball the holes, so they are not all exactly in the same location, but it works for me. I then sorted the cards as per the 150 Prismacolor pencil chart. I may still change my mind on the sorting of my swatches, but I opted to start with this. 


Once sorted, I divided the swatches into three sections and threaded each onto a book ring. This allows the swatches to move freely and yet they are easy to keep together.


I am excited to see how this works for me to help with finding the correct color pencil when working off of a reference source. This is definitely a tool that would come in handy with whatever medium one works with.

You are welcome to download my simple Prismacolor Premier pencil chart for these little swatches here.


Friday, May 11, 2018

A feel better card

Here I am again with another Conie Fong Art image. This time Bella with her tulips.


I colored her up with my Prismacolor colored pencils and added the polka dots to her dress with white gel pen. I made another attempt on the Canson Mi Tientes paper that I have, but still am of the opinion that I prefer the Strathmore Paint Pad paper for pencil work. I cut the image out with a stitched rectangle die.


I partially matted the image onto a piece of purple cardstock and adhered  three half banners to the opposite side. This was then added to a patterned paper panel sized at 4 x 5.25 inches which in turn was adhered to a notecard sized pink card panel. The panel was then glued to a top folding card base.


I was creating a Get Well card and so used the FEEL better sentiment from the Power Poppy Daffodils stamp set. I stamped it with Versamark ink and white heat embossed it on purple cardstock. The sentiment is popped up with foam tape to add just a little bit of dimension.

General supplies:
Canson Mi Tientes paper
Reflections 110lb heavyweight cardstock for card base
Pink and purple cardstock
Patterned paper from my stash
Prismacolor pencils
White gel pen
Stitched rectangle die
Stamp from Power Poppy Daffodils stampset
Versamark ink
White embossing powder

Let's be square

Life has been rather busy and I had some custom teddy bears to make, so I was a few days behind on my House Mouse card for the current challenge. The theme is Let's be Square and so what better opportunity than to make a first attempt at a 3D popup box card.


I used the image called Catchin' Some Shade! I colored the image with my Prismacolor colored pencils. But as you can see, those guys forgot their sunscreen. They have red noses and red bellies - not good!


I cut the 3 mice and the umbrella out with my Silhouette Cameo, using the PixScan mat. They cut out very beautifully. I ran a black marker along the cut edge to apply a finishing touch.


I created the box part of the card with my paper trimmer and score board. I adhered decorative panels cut from sand patterned paper and also sponged the edges of the cardstock flaps. The umbrella was added to the longer back panel as part of the backdrop and the 3 mice on the various box inserts to complete the 3D look. The backside of the long part got a lighter colored panel on which I wrote my note to the recipient. I added a sentiment that I stamped in Versafine Onyx Black ink and clear heat embossed to the front flap. I used a label die to cut the sentiment out with.


When folding the card to the side, all the popup elements lie flat. While I have the flaps still down in this photo to show how the inserts go flat, I folded them up to cover the contents before inserting the card into the envelope.


And yes, the 3D popup box card does fit into a standard notecard sized envelope as demonstrated here.


Warmer weather is finally arriving to those of us living on the northern side of the equator. But don't be like these mice - remember your sunscreen.

General supplies:
Strathmore Paint Pad paper
Medium and light yellow cardstock
Sand patterned paper
Prismacolor pencils
Stitched label die
Stamp from stash
Versafine Onyx Black ink
Clear embossing powder

Entered into the HMFMC Anything Goes/Optional theme "Let's be Square" challenge #265
Entered into the Lil Patch of Crafty Friends Anything Goes Challenge #81
Entered into the Little Miss Muffet Challenge Anything Goes Challenge #188

Monday, May 7, 2018

Your new home

Today I have a very exciting post to share with you. I have been chosen to be on the Design Team over at Crafting with an Attitude. This is my first time as a Design Team member and this is my first project with the team.

The sponsor in the current challenge is Lacy Sunshine and the image I used  is called Enchanting Treasure Cove Fairy House. I thought this was just perfect for a "congrats on your new home" card.


I printed the image onto Strathmore Paint Pad paper and colored it up with my Prismacolor colored pencils. Obviously some of the colors are less realistic, but is that not what one expects from an enchanted fairy house? Details were added with gel pens.


Once completed I cut the image out with a stitched rectangle die and adhere it to the front of a A2 cardbase. I cut the letters making up "your home" out on my Silhouette machine and glued them to the front in a whimsy arrangement.


Be sure to visit the Crafting with an Attitude challenge #39 Anything Goes and enter your project for a chance to win 3 of Lacy Sunshine's images.

General supplies:
Strathmore Paint Pad paper
Reflections 110lb heavyweight cardstock for card base
Prismacolor pencils
White, silver and gold gel pens
Stitched rectangle die
Black cardstock

Sunday, April 22, 2018

Let's eat...

I was back to browsing in my Very Mice Coloring book for a new image that matched the theme of  "Let's Eat" and I do believe that M-ice Cream fits the bill.


I opted to go with a complete CAS style on this card. It is one layer only. I colored the image with my Prismacolor colored pencils on Strathmore Paint Pad paper and then cut it out with a stitched rectangle die to give a little interest around the edge with the faux stitching.


I stamped a single word sentiment in the top left hand corner with Versafine Onyx Black ink and coated it with clear embossing powder. I thought the crayon look of the sentiment went perfectly with the image.


Writing this post makes me think those mice have a good idea - savoring delicious ice-cream.

General supplies:
Strathmore Paint Pad paper
Reflections 110lb heavyweight cardstock for card base
Prismacolor pencils
Versafine Onyx Black ink
Clear embossing powder
Stamp from my stash
Stitched rectangle die

Entered into the Entered into the HMFMC Anything Goes/Optional theme "Let's Eat" challenge #264
Entered into the Crafting with an Attitude Anything Goes Challenge #38
Entered into the Lil Patch of Crafty Friends Anything Goes Challenge #80

Friday, April 20, 2018

Wild Rose Studio stamps again

I don't have many physical stamp images as I mainly like to use digis, but I do have some teddy bear stamps from Wild Rose Studios and I simply love them so I use them over and over again. Today I made 4 thank you cards with them.

The first and second cards both use the Raining Roses stamp.


I colored the images with my Prismacolor pencils and then cut them out with a lacey oval and a stitched oval die respectively. The one I adhered onto a patterned paper and the other onto a piece of cardstock that had been embossed with a heart embossing folder. I added a die cut Thank you to each.

The third card uses the Teddy with Gerbera stamp


This was such a fun image to color as I had never done a rainbow flower before. I cut the image out with a tag die and adhered it to a embossed cardstock card panel, putting a bow through the tag hole. I added a thanks word die cut to the card.

The fourth card uses the Teddy with Present stamp


This image is a throwback challenge I set for myself. My first set of better colored pencils was a set of 24 Colleens that I got as prize in elementary school. I still have them. I used these pencils exclusively on this image. I then cut the image out with a circle die, cut a circle frame for the outer edge and applied it to an embossed cardstock card panel. I also added the thanks die cut word to the card to complete it.

You definitely will be seeing these stamps on my blog again in the future as I love to use them.

General supplies:
Strathmore Paint Pad paper
Reflections 110lb heavyweight cardstock for card base
Burgundy, kraft, pink and black cardstock
Wild Rose Studios stamps
Memento Tuxedo Black ink
Prismacolor pencils
Colleen colored pencils
Various dies from my stash
1/8th inch pink ribbon

Entered into the Alphabet Challenge Blog "B for Bears"
Entered into the Crafty Catz Challenge #413 ~ Anything Goes/C&S
Entered into the QKR Stampede Challenge #292 - Anything Goes


Back to Top