Thursday, April 19, 2018

Card swap

I love to do a card swap with another crafty friend and since I joined Instagram, I met Yasmin! She does beautiful work and I was inspired to do a card swap with her.

My card that I created for her uses the current progressive challenge image, Peggy is in love, by Sasayaki Glitter


I printed the digi onto Strathmore Paint Pad paper and colored it with my Prismacolor colored pencils, adding the highlights in the glasses with a white gel pen. I fussy cut the image out.


I created a scene on the background of the card by inking the sky and the ground pieces with Memento inks and a mini blending tool. I cut flowers in coordinating colors of cardstock and adhered them to the background. The flower centers were covered in Glossy Accents to create dimension and shine.

The sentiment was stamped with Versafine Onyx Black ink and then heat embossed with clear embossing powder. I cut it out with a cloud die and popped it up in the sky with foam tape.

The completed card panel was then adhere to a white cardbase.

AND, my Happy Mail from Yasmin arrived also...


I received a beautifully stamped wreath card with a popped up sentiment in the middle. Also another lovely sentiment with a sweet handwritten note on the back. The goodies were enclosed in a kraft envelope that was tied with baker's twine and had the round tag attached. So fun!

Take a moment to check out Yasmin's Instgram profile - you won't be sorry.

General supplies:
Strathmore Paint Pad paper
Reflections 110lb heavyweight cardstock for card base
Pink, yellow and green cardstock
Sasayaki Glitter Penny is in love digi
Prismacolor pencils
Stitched rectangle die
Flower, leaves and cloud dies
Sentiment from stash
Memento Inks
Versafine Onyx Black Ink
Clear embossing powder
Glossy accents
White gel pen


Sunday, April 8, 2018

Sweet friends

Today I have another mousey make to show you.


This image is also from the Very Mice Coloring book and is titled "summer's sweet scent". I have wanted to color this up for a while and since the current House Mouse challenge features multiples, this image of Monica and her furry friend was just perfect.

I printed the image on Canson Mi Tientes paper and colored it using my Prismacolor colored pencils. I had found the plaid patterned paper in my stash and thought it would make the perfect background and so coordinated the pencil colors on the flowers. I also added a few clouds in the background, this was my first attempt at free handing clouds in a background.


I then cut the image out with a stitched oval die and adhered it to the patterned paper which I had, in turn, cut out with a stitched rectangle die.


I added a sweet sentiment from my stash that I had stamped onto yellow cardstock with Vesafine Onyx Black and heat embossed with clear embossing powder. Using a stitched circle die, I cut the sentiment out and popped it up with foam tape. I also added a green leaf sprig die cut.

General supplies:
Canson Mi Tientes paper
Reflections 110lb heavyweight cardstock for card base
Patterned paper from stash
Yellow and light green cardstock
Versafine Onyx Black ink
Prismacolor pencils
Stitched rectangle, oval and circle dies
Leaf spring die
Sentiemnt stamp from stash
Clear embossing powder


Monday, April 2, 2018

Pink and purple

I love the combination of pink and purple. Here I took two Wild Rose Studio teddy bear stamps and colored them as opposites.


I stamped the images with Memento Tuxedo black ink onto Strathmore Paint Pad paper and colored the bears with my Prismacolor pencils.


The pink bear from a purple flower and purple gift.


The purple bear from pink flowers and a pink gift.

I cut the bears out with a lacey oval die and mounted them onto a patterned paper cardpanel.


The word Thanks cut out of light colored cardstock finished the cards off. I glued two die cuts on top of each other to give the embellishment some dimension.

General supplies:
Strathmore Paint Pad paper
Reflections 110lb heavyweight cardstock for card base
Patterned paper from stash
Light pink and light purple cardstock
Wild Rose Studios clear stamps
Memento Tuxedo black ink
Prismacolor pencils
Stitched rectangle and lacey oval dies
Thanks die


The bicycle at the fence

I have done posts before about my Maria Trolle Twilight Garden coloring book. I am not really a coloring book person, but this book is lovely with its hard covers. The paper works really well with my Prismacolor colored pencils.

This time I did the image with the bicycle leaned up against the wooden fence.


I decided to color the fence white. Don't we all long to have that white picket fence in our lives? And of course, the bicycle had to be red.


I finished the bicycle off by doing the chrome bits with a silver metallic gel pen. 

General supplies:
Twilight Garden coloring book
Prismacolor pencils
Silver metallic gel pen

Thursday, March 29, 2018

Ribbon and bows

Christmas always seems to creep up at top speed and so I decided to try and be ahead of the curve and so here is my first Christmas card for 2018.


I have used the mouse from the Berry Mice image from my A Very Mice Coloring Book. I colored her, yes her as her name is also Monica, with my Prismacolor Colored pencils on Canson Mi Tientes sand paper and then fussy cut her out.


I cut the gift that she is carrying out of Christmas patterned paper with a stitched hexagon die and applied the ribbon and bow with golden satin ribbon.

The top right hand corner is embellished with a flourish die cut done from DCWV metallic washi tape paper and I added the sentiment in the middle. The sentiment is white heat embossed on black cardstock and then cut out with a stitched circle die.


I created my scene on a card panel just slightly smaller than a regular A2 sized card which I embossed with a Darice snowflake embossing folder. I then adhered the card panel onto a cardbase to complete the card.

General supplies:
Canson Mi Tientes sand colored paper
White and black cardstock
DCWV Metallic Washi Tape paper
Berry Mice House Mouse image
Sentiment stamp from stash
Prismacolor pencils
Stitched hexagon and circle dies
Flourish die
Darice Snowflake embossing folder
Versamark ink
White embossing powder

Entered into the HMFMC Anything Goes/Optional theme "Ribbons or Bows" challenge #262
Entered into the Stempelsonne Anything Goes Challenge #200
Entered into the Cardz 4 Galz Buttons and/or Bows Challenge #68


Sunday, March 18, 2018

Emboss and die cut

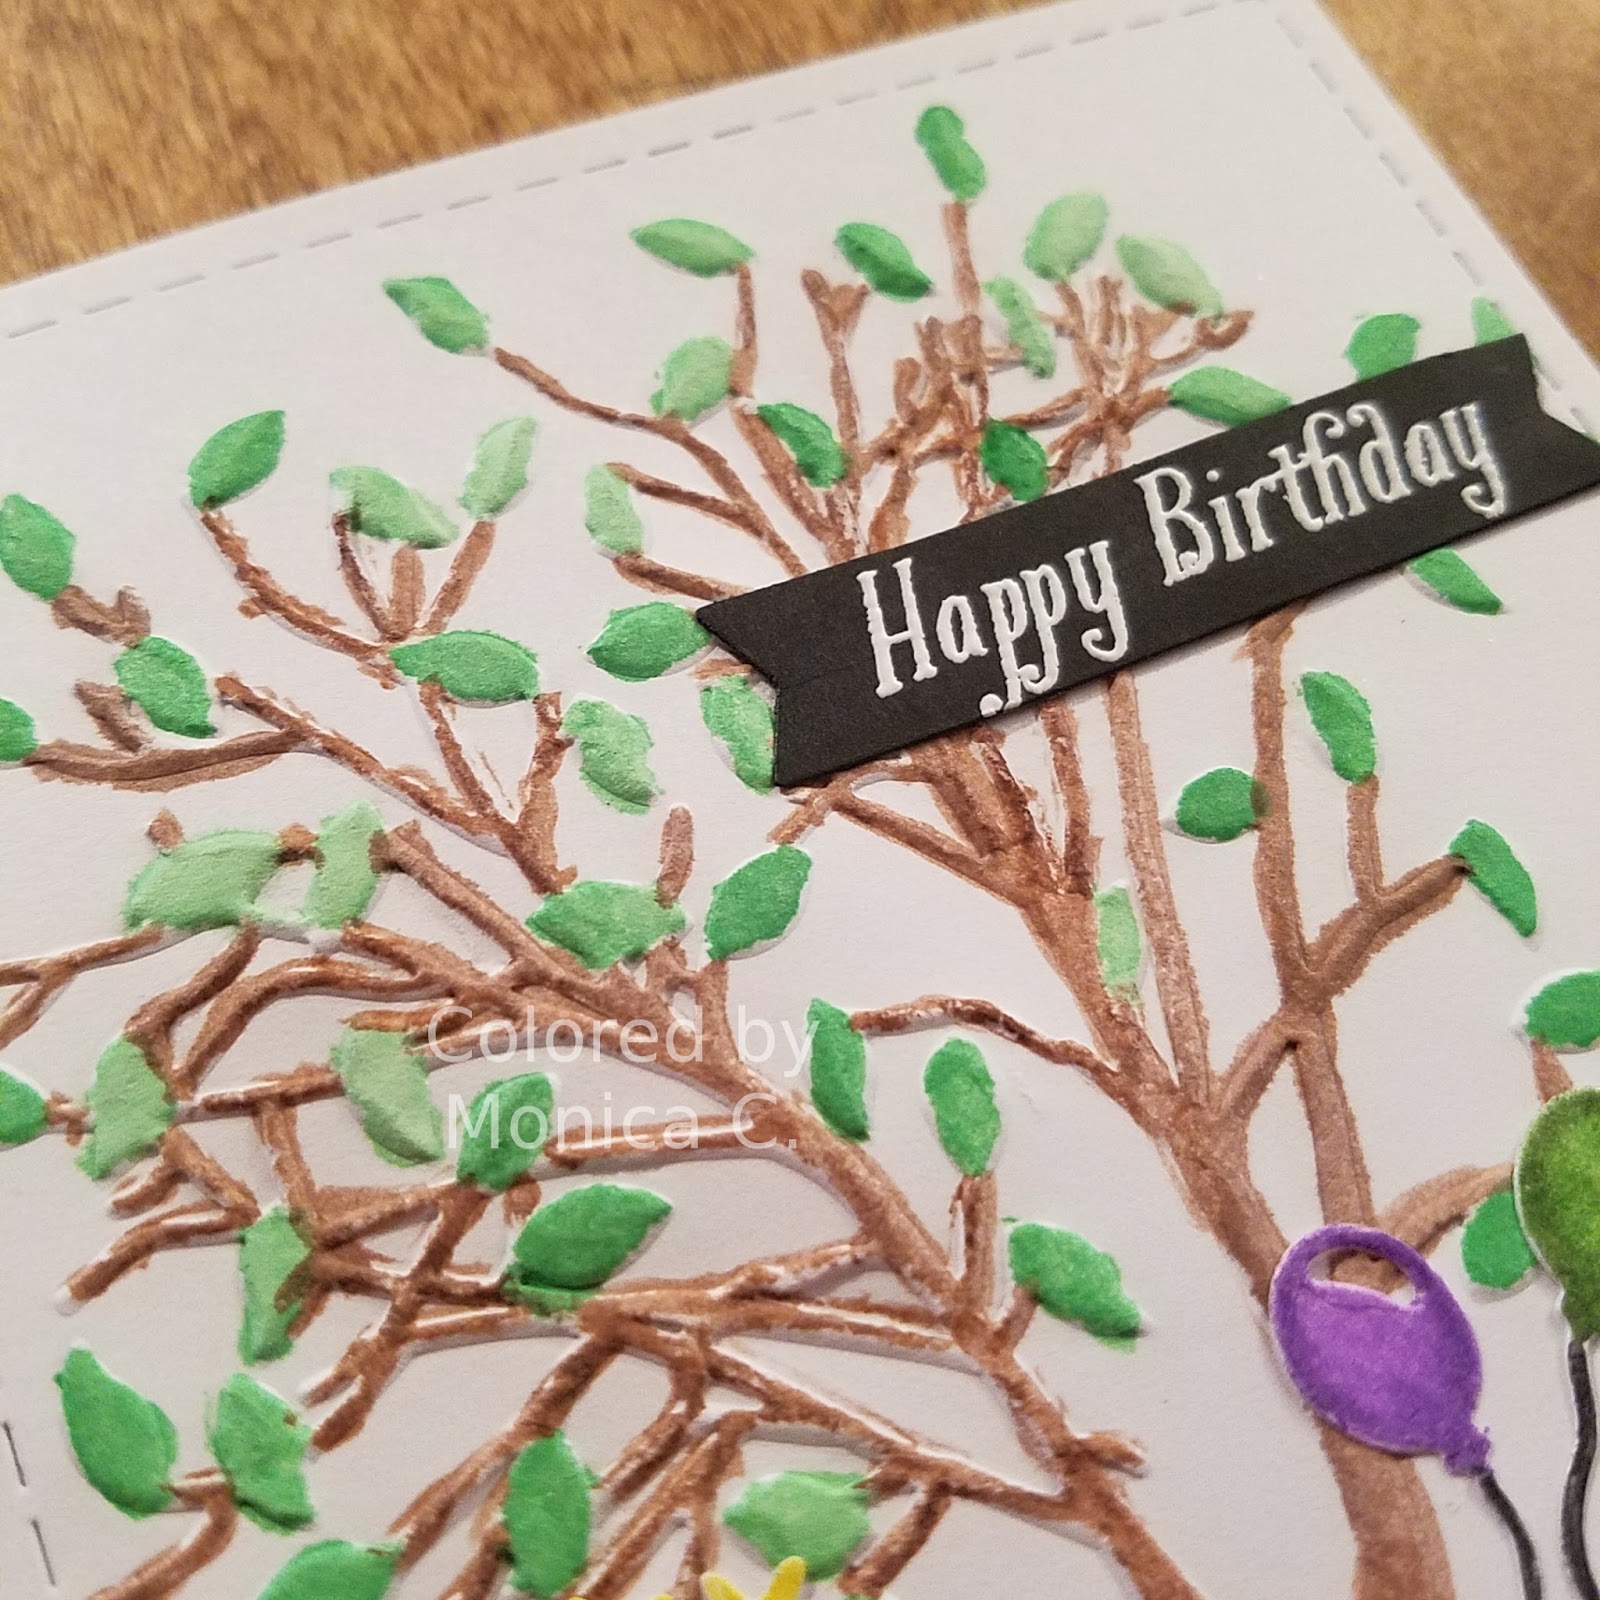
I have another birthday card to share with you today. This one was inspired by my Darice embossing folder with a whole tree on it.


I embossed the card panel with the tree embossing folder and then used my Crayola water color paints to paint the leaves and the stem. I was going for whimsy on this entire card and so did some very loose watercoloring here, not attempting to color the whole raised area of each leaf or the branches. I added some grass along the base of the panel with a light green paint.

The bicycle is a die cut which I colored up with my Prismacolor colored pencils.


Here again I was going for whimsy and so did not add much shading or blending, just adding color.


In keeping with the loose watercolor on the embossed tree, I did not attempt to cover up every little bit of the white cardstock of the die cut.


I added the Happy Birthday sentiment by white heat embossing the sentiment onto black cardstock and cutting it out with a small banner die. I added this banner over the tree branches on the top right hand side of the card.

Water color was an excellent medium to color the tree in with as it needed no pressure to apply the color and thus all the embossing on the panel was kept in tact.

General supplies:
Cardbase from Paper Studio Simple Basics collection
White and black cardstock
Crayola watercolors
Prismacolor pencils
Versamark ink
White embossing powder
Happy Birthday sentiment stamp
Darice tree embossing folde
Bicycle die


Saturday, March 17, 2018

No pencils

I am always needing birthday cards (aren't we all?) and so today I have been busy.


This card is another one using the emboss resist technique. It is so fascinating to watch the design pop out of the white card when applying the ink over the top.

The stamps are retired Stampin Up stamps and I stamped them with Versmark ink directly onto the card base to make this a one layer card. I embossed with white embossing powder. Then using Memento inks with a mini blending tool, I applied the color.


I do enjoy ink blending and will definitely do it again in the future.

General supplies:
Reflections 110lb heavyweight cardstock for card base
Stamps from stash
Versamark ink
White embossing powder
Memento inks
Mini blending tool


Back to Top